
Deliver amazing user experience for WEB
Introduction
- Reliable - load instantly even on slower/uncertain network.
- Fast - Respond quickly to user interactions
- Engaging - Feel like natural app on device with amazing user experience.
Reliable
When launched from the user’s home screen, service workers enable a Progressive Web App to load instantly, regardless of the network state. A service worker, written in JavaScript, is like a client-side proxy and puts you in control of the cache and how to respond to resource requests. By pre-caching key resources you can eliminate the dependence on the network, ensuring an instant and reliable experience for your users.Fast
Users will abandon a site if it takes longer than 3 seconds to load! And once loaded, users expect them to be fast—no janky scrolling or slow-to-respond interfaces. Check more on PerformanceEngaging
Progressive Web Apps are installable and live on the user's home screen, without the need for an app store. They offer an immersive full screen experience with help from a web app manifest file and can even re-engage users with web push notifications. The Web App Manifest allows you to control how your app appears and how it's launched. You can specify home screen icons, the page to load when the app is launched, screen orientation.Service worker:
A service worker is a script that your browser runs in the background, separate from a web page, opening the door to features that don't need a web page or user interaction.
Service worker is proxy between our APP and Network, its has control for our incoming and outgoing secure network request as well as our browser cache. It helps how app should behave when its offline, should use cache. Check various browser supporting service worker status here. Most of the part of our app is unchanging. The dynamic content is changed using API requests. So ideally we would like to tell the browser to hold onto that unchanging content of our app to prevent extra requests and to speed up rendering. This is where Service Workers come in. Using Service Workers we can explicitly tell the browser: “I want you to hold static content (JavaScript, CSS & HTML) until i tell you”. This allows the browser to use our application shell by default. Instead of requesting the resources from the network, we use the cache every time even when there is no network connection. This in turn speeds up our app startup and allows our app to work better offline.
Sample Application
We will create simple Angular application. Will use Service worker to make app lightning fast, have offline capability, cache static content, caching runtime calls with Network First strategy. Create application using Angular CLI, "ng new my-app" is command to create default application. Enable the service worker by making following changes in index.html file. Add below code bottom of file exactly before "</body>" tag.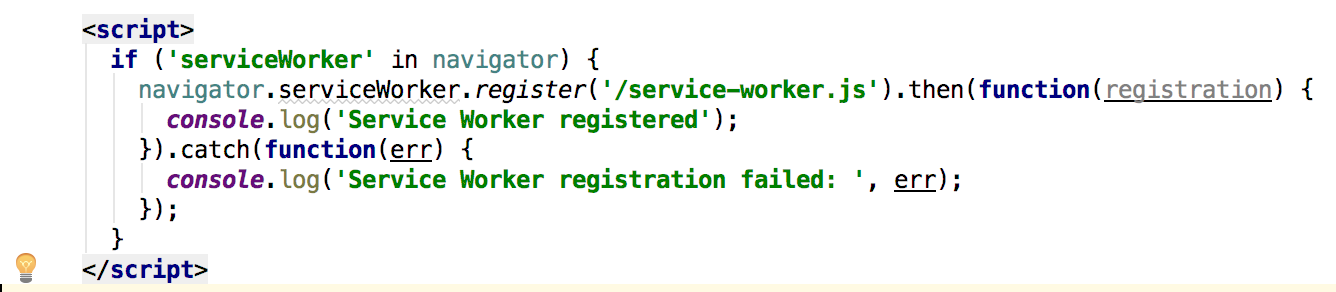
Create blank "service-worker.js" file in src folder. Add following entry in "angular-cli.json"

Serve the app using "ng serve" command.

Open chrome developer
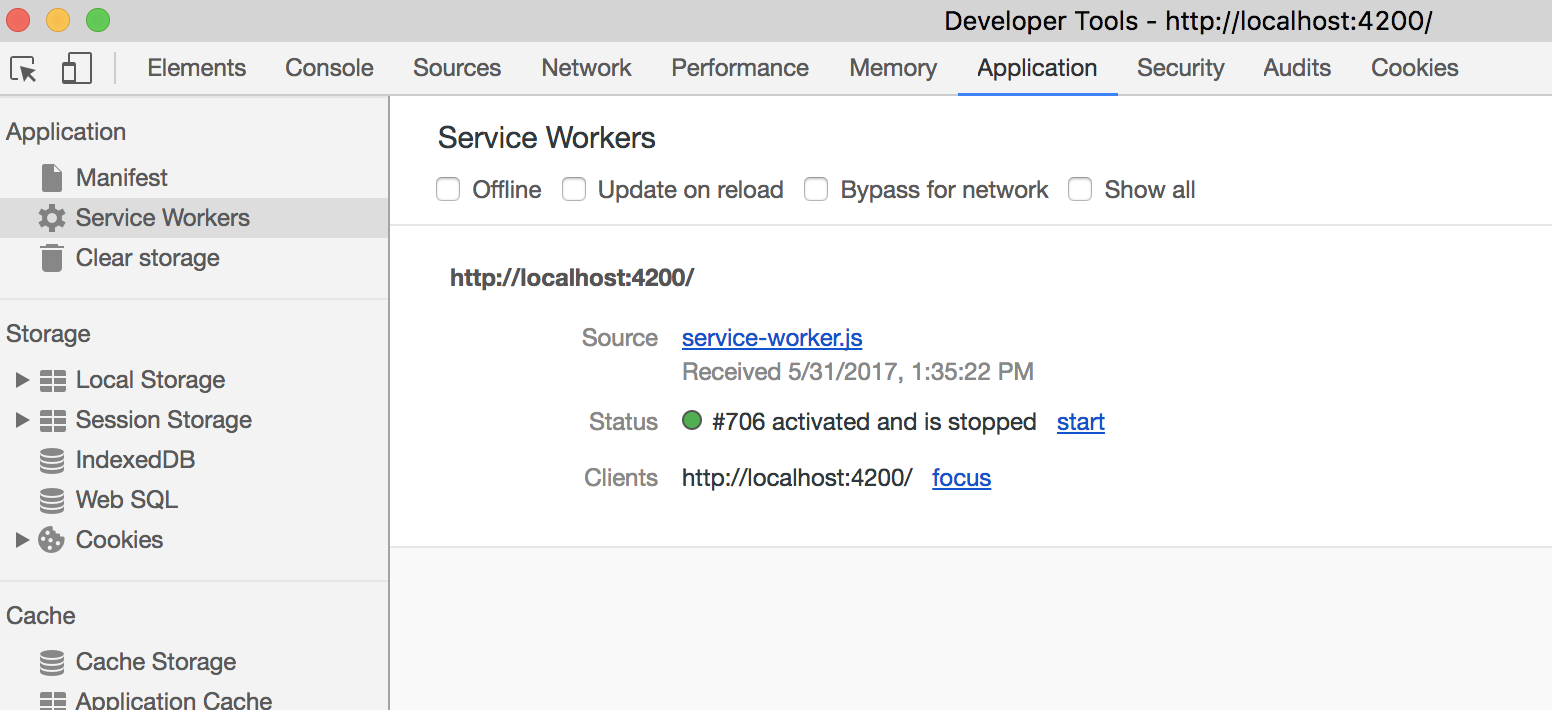
Here we can see Service Worker is successfully installed. Browser will always use this copy, if there is change browser will re-install service-worker.js. Now service worker is successfully installed, we can write logic for caching. But writing logic is complex and needs to handle various scenarios. To avoid this complexity Google Developer has created small library SW Precache on top of Service Worker to create some of useful offiline patterns. SW Precache is a build time tool that looks at our generated static (JS, CSS and HTML) and generates a Service Worker file for us. This generated Service Worker contains a hash specifically for each file in that build for the browser to cache and use even when offline. In subsequent builds the hash changes which causes the browser to request the updated files. Now Build the project : "ng build --prod", this command will compile code and put in dist folder which can deploy and serve as angular app.
Install SW Precache: "npm install --save-dev sw-precache" We need to add couple of npm scripts to our project, make following changes to package.json.

Create "sw-precache-config.js" file and add below content. More details on every attribute can be found here.

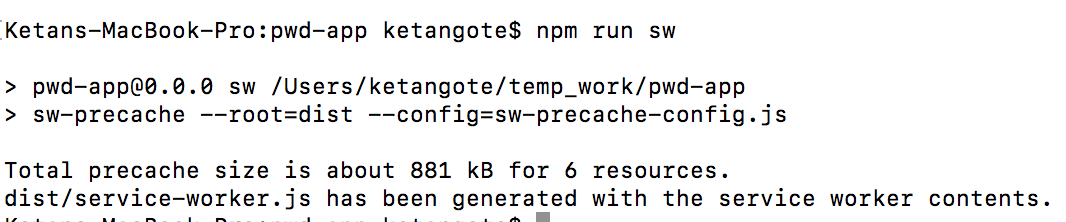
Now lets run our npm command "npm run sw"
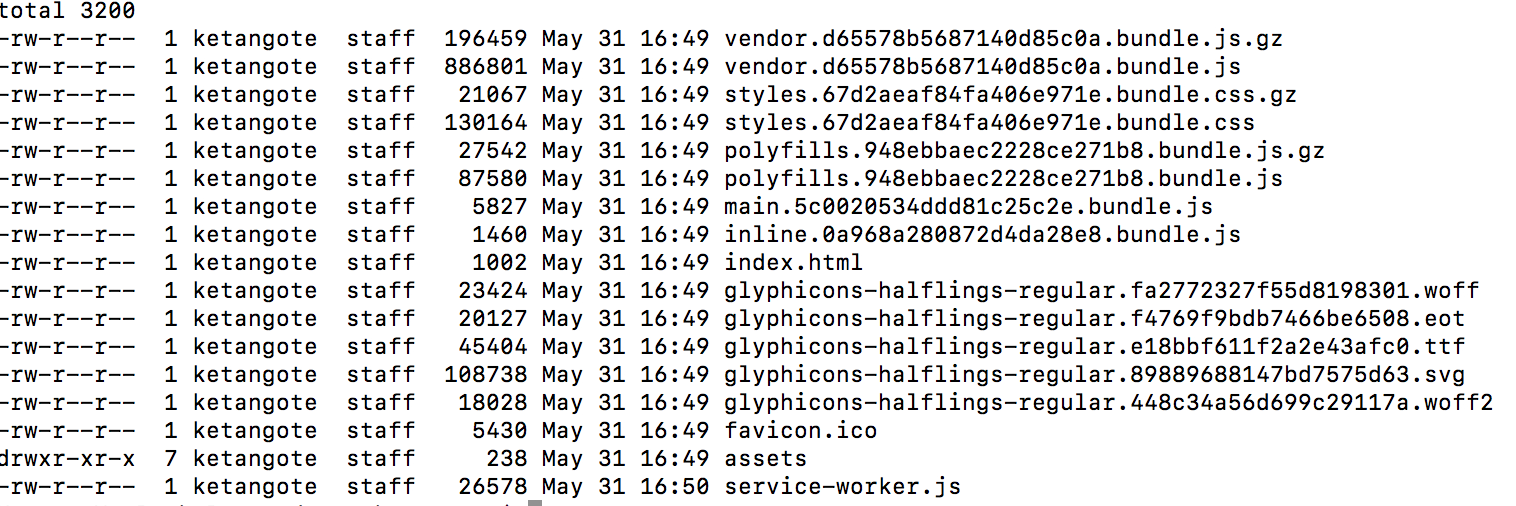
If we look in our generated Service Worker in our dist directory we should see some generated code. If we look through it we can get a idea of how the code is handling all the cache logic for our application. Copy the dist content to any HTTP sever and open in browser.

Goto chrome developer tool -> Application and select offline mode, Reload the page, All the content will be served using service-worker from cache.

Now we will add more functionality to this Angular APP, we will create page (as a default route) which will display list of mobiles. Copy app & assets folder from GIT
- app.component.html
- app.component.ts
- app.module.ts
- app.routes.ts
- app.service.component.ts
- mobiles.component.html
- mobiles.component.ts

Above runtime caching config is caching url with pattern "../api/..". If network is available it will be served from network otherwise served from cache. Form more info on handlers click here.
As we are using bootstrap styles add bootstrap dependencies. Add "bootstrap": "^3.3.7" in devDependencies section in package.json

Add bootstrap style in angularcli.json also.

Now build the application "ng build --prod" Make service worker changes "npm run sw" Copy the dist folder to your http-server and open in browser.
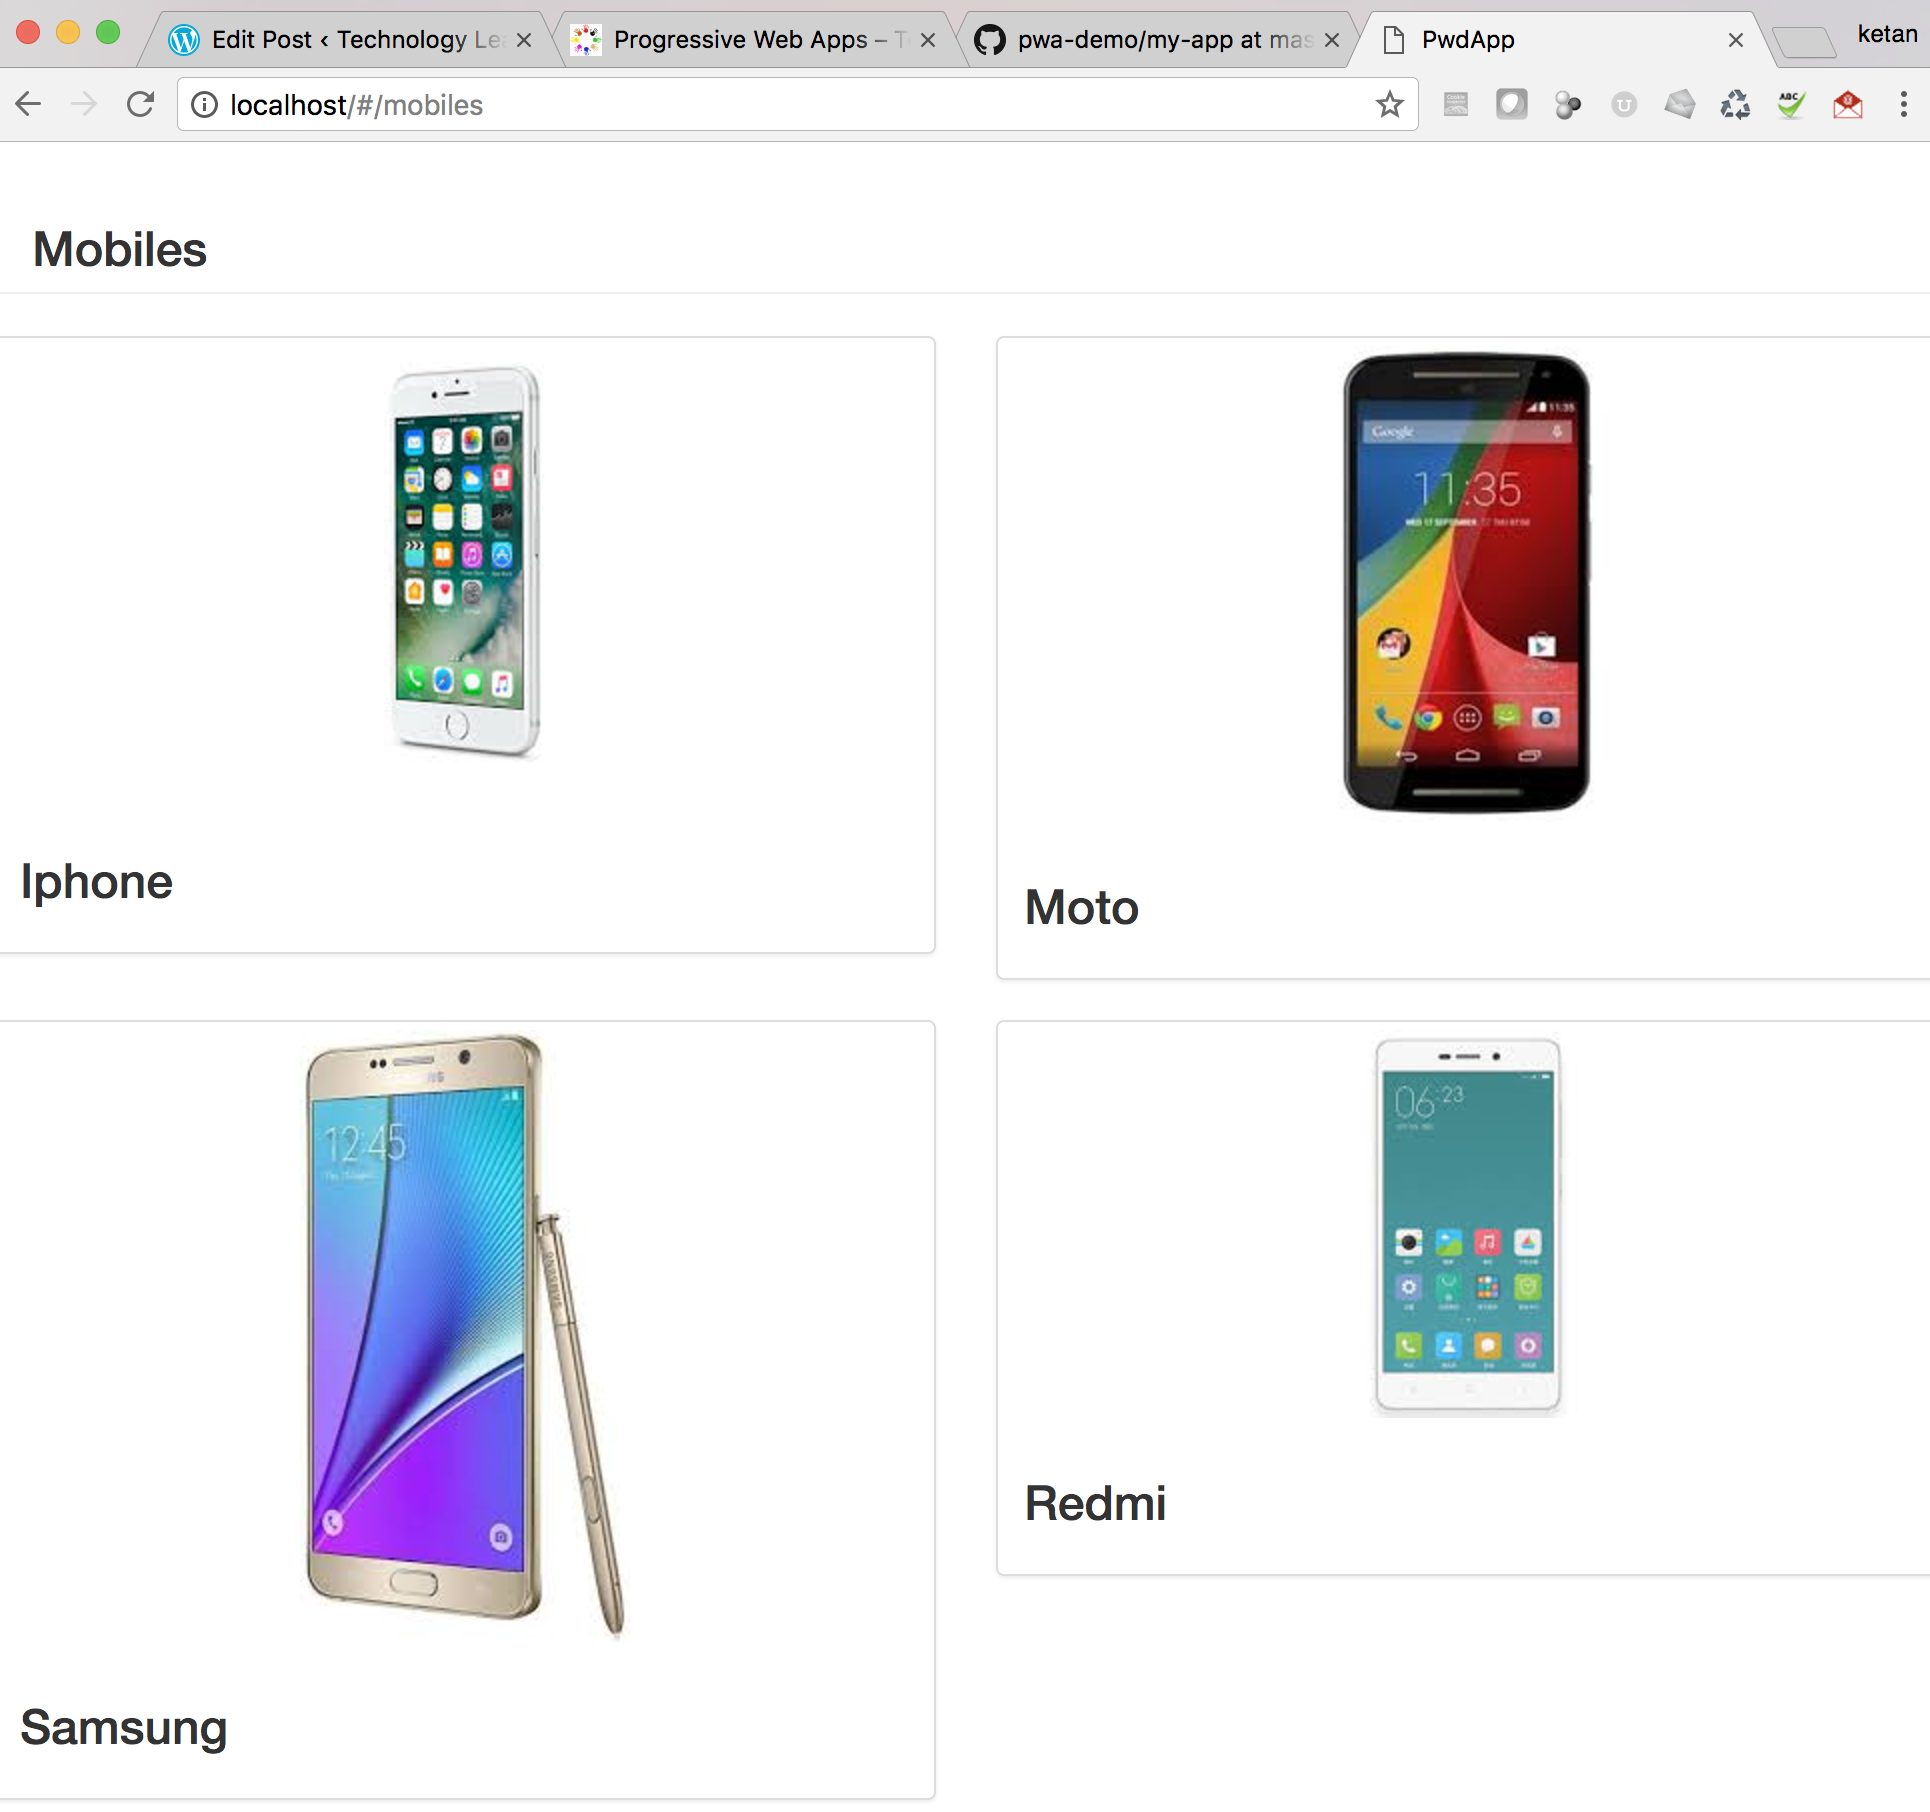
Goto chrome developer tool -> Application and select offline mode, Reload the page, All the content will be served using service-worker from cache.
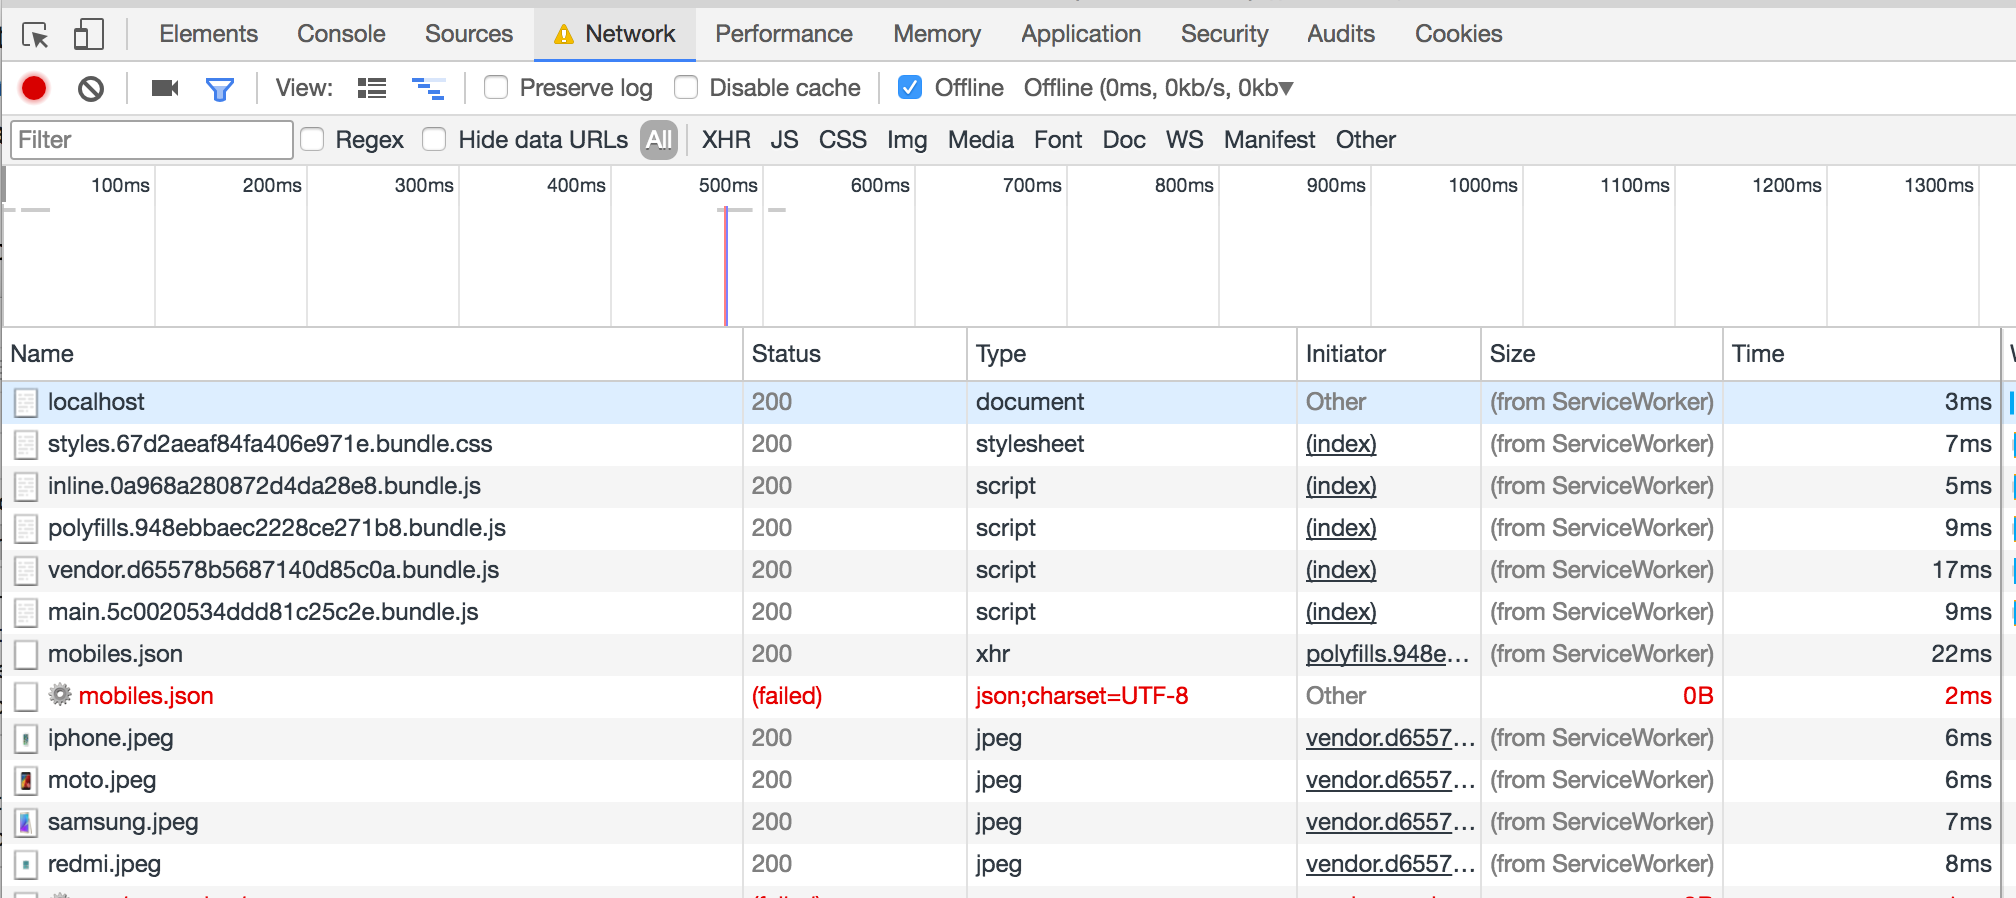
The xhr request over network has failed and its served from cache using service worked.
Source code for sample application is on GIT
Useful links
- https://developers.google.com/web/progressive-web-apps/
- https://developers.google.com/web/fundamentals/getting-started/primers/service-workers
- https://github.com/GoogleChrome/sw-precache
- https://googlechrome.github.io/sw-toolbox/#main
- https://www.youtube.com/watch?v=C8KcW1Nj3Mw&t=1391s
- https://www.youtube.com/watch?v=cmGr0RszHc8
- https://www.youtube.com/watch?v=m-sCdS0sQO8
Cheers – Happy learning 🙂
Ketan Gote

Comments
Post a Comment